When it comes to electrical work, it’s easy to feel like you’re walking a tightrope. In McKinney, TX, ensuring your residential outlet installation is safe and compliant with local codes is vital. From selecting the right outlet type to understanding necessary safety precautions, there’s a lot to reflect on. Let’s investigate the fundamental tips that’ll help you navigate this process with confidence.
Understanding Local Electrical Codes and Regulations
When you plan to install residential outlets, it’s vital to understand local electrical codes and regulations, as they guarantee safety and compliance in your home.
These codes dictate everything from outlet placement to circuit requirements, confirming your installation meets safety standards. Familiarizing yourself with these rules can prevent hazardous situations and costly mistakes.
Start by checking with your local building department or electrical inspector to get the most recent codes.
You’ll likely find specific guidelines for outlet height, spacing, and GFCI requirements, especially in kitchens and bathrooms.
Don’t overlook the importance of permits; they’re often required for residential electrical work and help ensure your project adheres to local codes. Additionally, consulting a professional residential electrician can provide insights into the latest regulations and ensure your installation is safe and compliant.
Choosing the Right Outlet Type for Your Needs
Understanding local electrical codes and regulations sets the groundwork for a safe and compliant outlet installation.
Once you’ve done that, it’s time to choose the right outlet type for your needs. Consider the purpose of each outlet in your home. For general use, standard 15-amp outlets are typically sufficient.
Nevertheless, if you’re powering heavy appliances or tools, you might need 20-amp outlets or even specialized outlets like GFCI (Ground Fault Circuit Interrupter) for wet areas, ensuring safety against electrical shocks.
If you’re into tech, look into USB outlets for charging devices without adapters. For outdoor use, weather-resistant outlets are crucial to withstand the elements.
Think about future needs, too; installing outlets that accommodate your evolving technology can save you time and hassle down the line. Taking the time to choose the right outlet now will pay off later in convenience and safety. Additionally, consider the benefits of upgrading outlets to enhance the safety and efficiency of your electrical system.
Gathering Necessary Tools and Materials for Installation
Before you plunge into your outlet installation project, you’ll want to gather all the necessary tools and materials to guarantee a smooth process.
Start with a screwdriver set, preferably with both flat-head and Phillips options. You’ll also need wire strippers, pliers, and a voltage tester to ensure safety during installation. Don’t forget electrical tape and wire nuts for securing connections.
Next, collect the materials like the outlet itself, faceplate, and electrical box. If you’re replacing an old outlet, make sure to check if you need a different size or type based on your existing setup.
Furthermore, having a flashlight handy can help illuminate tight spaces.
Lastly, confirm to wear safety goggles and gloves for protection. Having everything on hand before you start will keep your project efficient and safe, allowing you to focus on the actual installation process. Additionally, it’s wise to consider contacting licensed electricians in case you encounter unexpected issues during installation.
Step-by-Step Guide to Installing a Residential Outlet
With your tools and materials ready, it’s time to tackle the installation of your residential outlet. First, turn off the power at the breaker box to guarantee safety.
Next, use your stud finder to locate the wall studs and mark the desired location for your outlet. Cut a hole in the drywall using your drywall saw, making sure it’s the correct size for your outlet box.
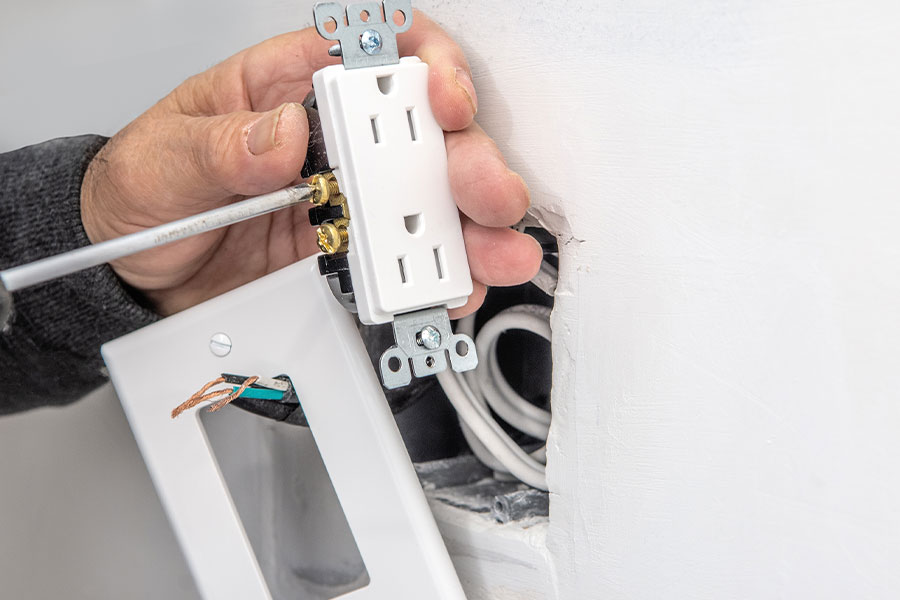
Now, run the electrical cable from the power source to your outlet location. Strip the ends of the wires, and connect them to the outlet: black to brass, white to silver, and green or bare to the grounding screw.
Secure the outlet in the box, then attach the cover plate.
Finally, turn the power back on at the breaker and test your new outlet with a voltage tester. If everything works, you’ve successfully installed your residential outlet! Remember, it’s crucial to ensure compliance with state regulations during installation to guarantee safety and quality.
Safety Precautions to Follow During Outlet Installation
While installing a residential outlet can be straightforward, prioritizing safety is crucial to avoid accidents and guarantee a successful project. Start by turning off the power at the circuit breaker to verify no electricity flows to the area where you’ll work. Use a voltage tester to double-check that the wires are de-energized.
Wear safety goggles and gloves to protect yourself from debris and potential electrical shock. When handling wires, strip them carefully and avoid touching bare conductors with your hands. Secure connections tightly using wire nuts to prevent any loose connections, which could lead to shorts.
Always use the proper tools designed for electrical work, like insulated screwdrivers and pliers. Lastly, verify your workspace is dry and free from clutter. If you’re ever unsure, don’t hesitate to contact a professional electrician like Blue Line Electric for expert guidance and assistance.
Your safety should always come first!

Conclusion
In McKinney, TX, ensuring your outlet installations are both safe and compliant can’t be overstated. Did you know that improper electrical work accounts for nearly 20% of home fires? By following the local codes and safety measures outlined, you can greatly reduce risks while enhancing your home’s functionality. So, take the time to equip yourself with the right knowledge and tools—your safety and peace of mind are well worth it!